🎯 Section 02: Complete the HTML Targets
📝 Summary
In this section, you will complete the HTML structure that JavaScript will control throughout the rest of the project. You will expand the page by adding a full book-entry form, a status/control row, and a table body target where book rows will be inserted later with JavaScript.
✅ Checklist
- [ ] Open the existing
index.htmlfrom Section 01. - [ ] Replace the Section 01 placeholder area with the full form markup.
- [ ] Add IDs on form inputs and controls so JavaScript can target them later.
- [ ] Add the status row with
Total BooksandClear All. - [ ] Add the table with
<tbody id="book-list"></tbody>for dynamic rows. - [ ] Confirm
app.jsis still linked at the bottom ofindex.html. - [ ] Keep the Section 01 starter comments in
app.jsfor now.
🎓 Core Concepts (HTML and CSS)
This section is about creating "targets" that JavaScript can control later. A target is just an HTML element your code can find and use. The main way you create targets is with an id. You can think of an id like a name tag that should be unique on the page. When you write id="title" or id="book-list", you make those elements easy to grab later with JavaScript.
You are also building a complete form structure. A form is the area where users enter information. Labels (<label>) describe each input so users know what to type, and matching for/id values connect labels to the right fields. This improves clarity and accessibility. You are also separating page parts by purpose: the form gathers data, the status row shows quick info, and the table displays results.
CSS ideas in this section come from Bootstrap classes. A class like form-control styles text boxes, btn styles buttons, and table styles table layout. You do not need custom CSS yet because these helper classes keep the page readable while you focus on structure. Another important setup choice is the disabled attribute on the Add Book button. Disabled means the button starts in an "off" state until JavaScript turns it on when the form is valid.
💻 Code to Write
HTML (index.html)
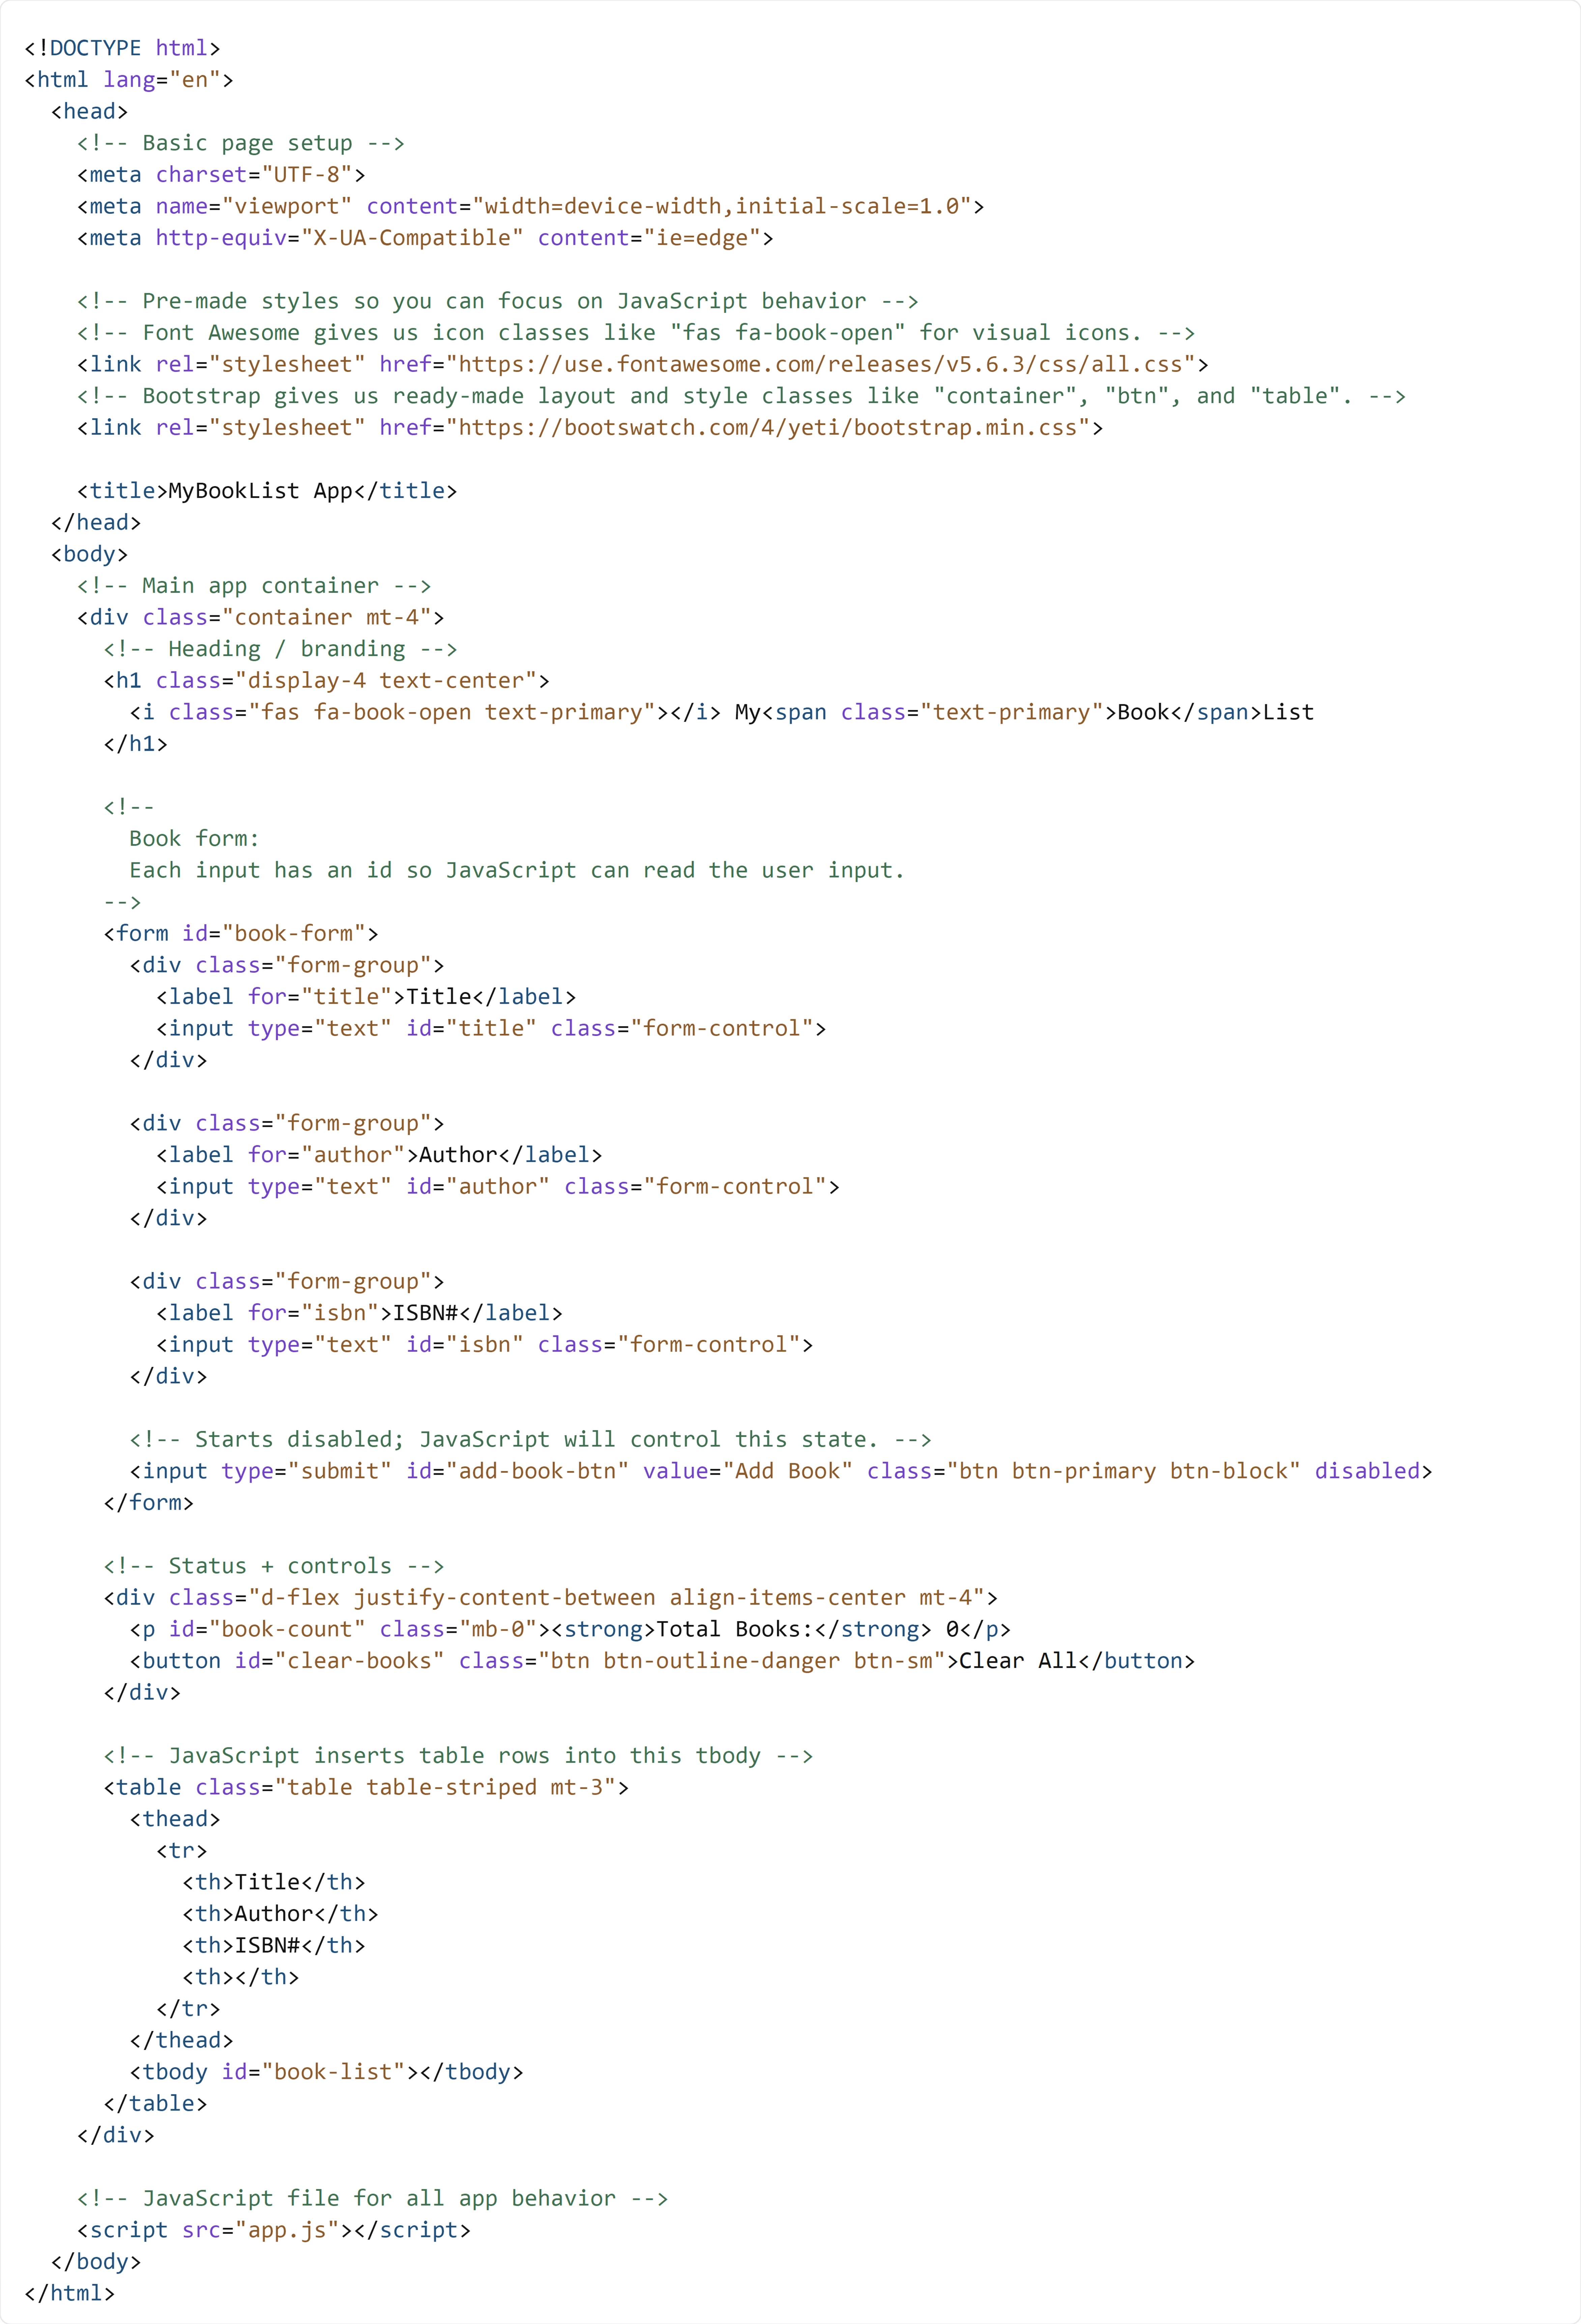
Open index.html in the project root. Keep the document shell from Section 01, then type the code below by hand so the main .container includes the full form, status row, and table shown below.
In this section, you are adding HTML targets that JavaScript will use in Section 03 and beyond.
CSS (This Section)
No custom CSS is added in this section. You should continue using the Bootstrap and Font Awesome links already present in index.html.
JavaScript (app.js)
Open the existing app.js in the project root. Do not add new logic yet. Type the Section 01 starter comments by hand so the file is ready for Section 03.
The next section adds the first real JavaScript behavior in this same app.js file.

🧠 Detailed Key Concepts
Look closely at <form id="book-form">. This wraps all input fields and creates one clear area for book entry. Each input has its own id (title, author, isbn), and those IDs are the exact names JavaScript will use later. The matching labels (<label for="title">) are important too. The for value should match the input id, which helps users click the label to focus the input.
The submit line is packed with meaning: <input type="submit" id="add-book-btn" ... disabled>. type="submit" means it sends the form. The id gives JavaScript a handle to control this button. The disabled attribute means the button begins off, which prevents incomplete submissions before validation rules are added. You are preparing behavior now, even though the behavior code comes later.
Next, the status row and table create display targets. <p id="book-count"> is where the running total will be written. <button id="clear-books"> is the future clear-all control. In the table, <tbody id="book-list"></tbody> starts empty on purpose. Later, JavaScript will create rows (<tr>) and insert them there. This is called dynamic content, which means content built while the page is running, not hard-coded at page load.
Even the small JavaScript placeholder matters in this section. Leaving that placeholder reminds you that Section 02 is still setup work. First build clean HTML targets, then write behavior on top of them. That order makes debugging easier because each layer is built on a stable foundation.