🧱 Section 01: HTML Shell and Library Links
📝 Summary
In this section, you will build the starting structure of your app so JavaScript can control it in later sections. You will create a valid HTML document, connect Bootstrap and Font Awesome as support libraries, add the main app heading, and create the starter app.js file.
✅ Checklist
- [ ] Create
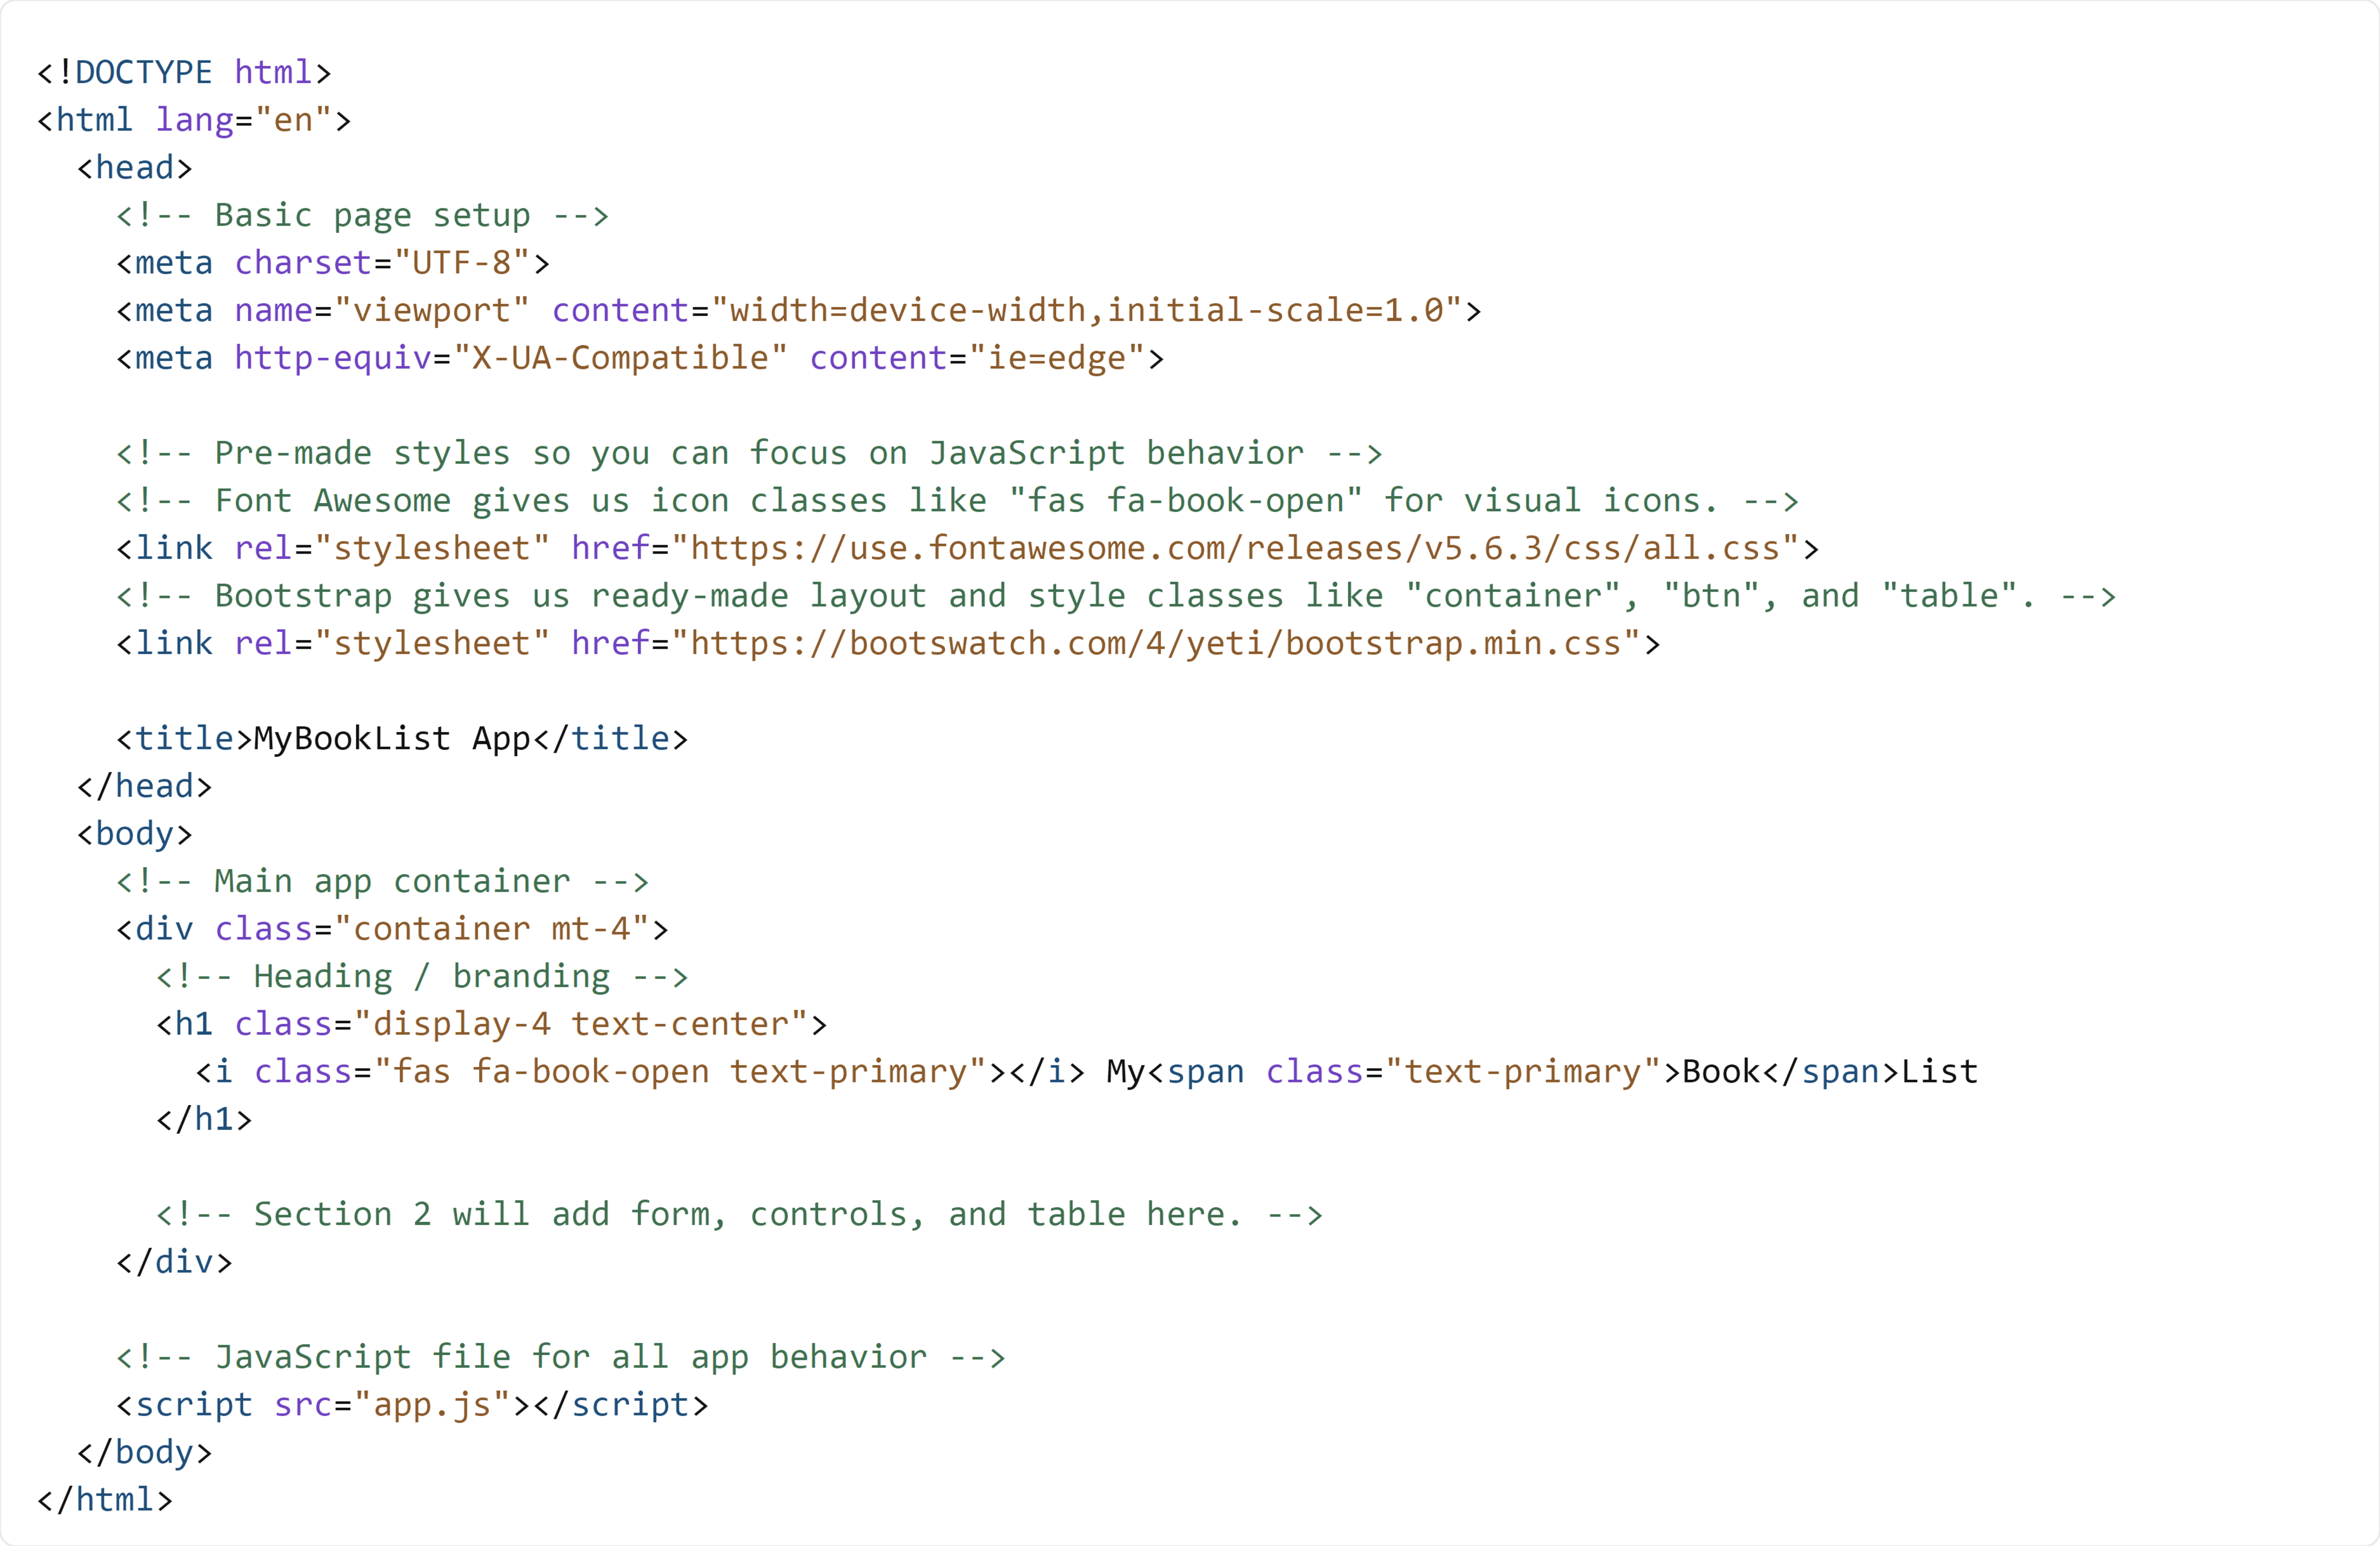
index.htmlin your project root. - [ ] Add the full HTML shell (
<!DOCTYPE html>,<html>,<head>, and<body>). - [ ] Link Font Awesome and Bootswatch (Bootstrap theme) in the
<head>. - [ ] Add the app container and heading in the
<body>. - [ ] Link
app.jsat the end of the<body>. - [ ] Create
app.jsin your project root with the section starter comments.
🎓 Core Concepts (HTML and CSS)
Think of a web page like a building project. HTML is the frame (what exists and where it goes), CSS is the paint and layout (how it looks), and JavaScript is the behavior (what changes when someone clicks or types). In this section, you are building the frame first so later JavaScript work has something solid to control.
The page "shell" is the basic outer structure your browser needs. Tags like <html>, <head>, and <body> are not optional decoration; they tell the browser how to read the file. A tag is a command in angle brackets, like <p> or <h1>. In the <head>, you also add meta tags (small settings for the page). For example, charset="UTF-8" helps text display correctly, and the viewport setting helps the page size correctly on phones.
You also connect Bootstrap and Font Awesome. These are external style libraries, which means prebuilt CSS code you can use right away. Bootstrap gives quick layout and spacing classes, and Font Awesome gives icon classes. This keeps you focused on learning JavaScript instead of spending this section writing custom styles. Last, you place <script src="app.js"></script> at the end of the <body> so the page loads first. That helps prevent errors when JavaScript tries to find page elements.
💻 Code to Write
HTML (index.html)
Create index.html in the project root folder. Then type the code below by hand.
CSS (This Section)
You do not need to write custom CSS in this section. Styling is handled by the Bootstrap theme and Font Awesome links in your HTML.
JavaScript (app.js)
Create app.js in the project root folder (same level as index.html). Type these lines by hand:

🧠 Detailed Key Concepts
Start with <!DOCTYPE html>. This tells the browser to use modern rules, not old legacy behavior. Then <html lang="en"> sets the language to English, which helps screen readers and accessibility tools. Inside <head>, the charset line controls text encoding (how letters and symbols are stored), and the viewport line controls scaling on mobile devices.
The two <link rel="stylesheet"> lines load outside CSS files. The word stylesheet means a file that holds CSS rules. Once loaded, classes like container, mt-4, display-4, and text-primary start working. A class is a reusable style name you place in class="...". In your heading, the icon element <i class="fas fa-book-open text-primary"></i> works because Font Awesome maps those class names to an icon graphic.
Inside <body>, <div class="container mt-4"> creates a centered content area with top spacing. The h1 heading with display-4 text-center makes the title large and centered. The <span class="text-primary">Book</span> line styles only one part of the word, which is a useful technique when you want emphasis without changing the whole heading.
At the bottom, <script src="app.js"></script> links your JavaScript file. Keeping this script tag near the end of <body> is a practical beginner habit. By the time the script runs, the HTML is already on the page, so future code like document.querySelector(...) can find elements safely.